So how to merge those old OFP textures then, or any other texture you wish to use?
Well first of all we use three (or four) utils to merge them, first we use PanTool to combine the textures into one big texture, we use Texview2 to save it into paa/pac format, then we use the export version of O2PE to save our model to old format p3d and finally we use old OFP O2 to merge the textures as new O2PE's merge feature is not working.
Here is the step by step tutorial I put together.
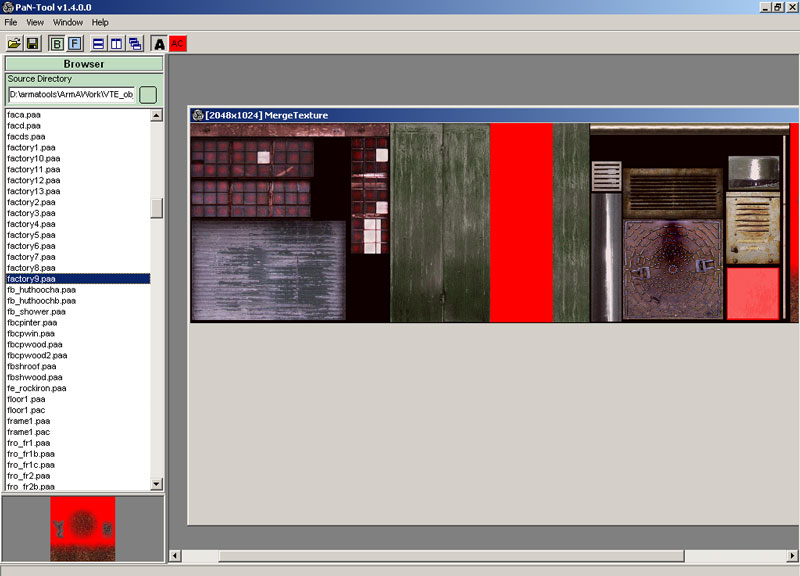
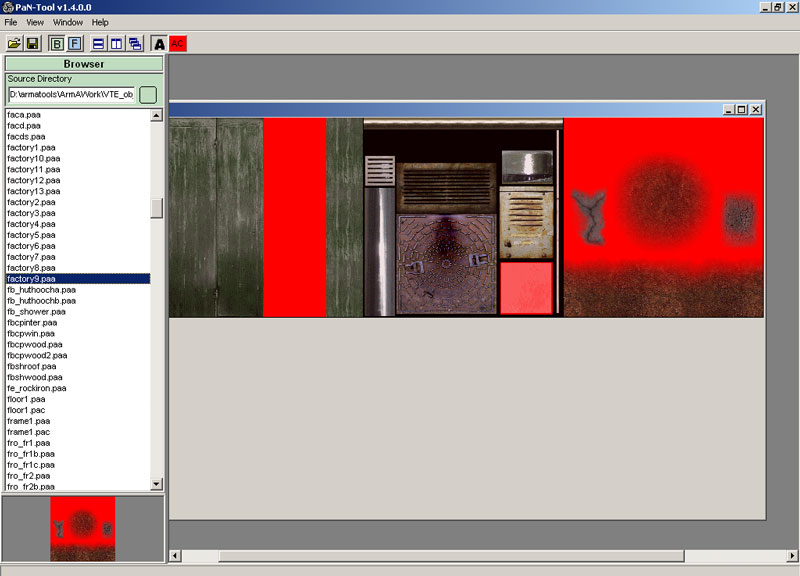
1) In PanTool select File -> New Merged Texture
2) Adjust your windows desktop resolution to high enough so you can drag the MergeTexture window into 2048x2048 if you so choose to do so.
3) Drag and drop all your wanted small textures from the browser into this MergedTexture window and organize them as you see fit.
4) Use File -> Save As... and select texture name + TGA extension. We call it MyTexture.TGA now.
5) Open Texview2, load MyTexture.TGA and choose File -> Save As... and use MyTexture.pac filename.
6) Open the MyTexture.PTM file with your favourite text editor. Edit all addon paths and filenames to be case-sensitive and 100% correct! Edit the ending models[] part to put your p3d name youre going to merge these textures into.
7) Use O2PE export version to save your p3d to the old p3d format with File -> Export -> P3D Old Version... feature (skip this if its already in old p3d format).
8) Use OFP O2 to load up your exported p3d.
9) Select all faces (CTRL-A), then use Surfaces -> Merge Textures, choose MyModel.PTM file. O2 will display nothing at this point. Now check face properties (E) to see if the paths + texture names changed.
10) Repeat 9 to all LODs.
Done.
If there was errors after following those ten steps, then most likely your PTM script file was incorrect, some paths must have been upper/lower case letters or addon path name were wrong etc. That PTM script with is very strict about its configuration, take good care preparing it. You can also run the script as many times you like, it only changes the textures it finds matches for, so if there is errors on the script... nothing happens. Check the unchanged textures from face properties and then search the PTM to check where there is problem and fix it.
Hope this helps someone whos looking into merging textures into ArmA compatible/quality requirement standards